MiraBridge Phone for Dynamics 365 CIF v2 Setup Guide
This guide provides step-by-step instructions for deploying MiraBridge Phone within Dynamics 365 environments using the multi-session (CIF 2.0) framework.
Prerequisites
Before starting, ensure you have:
- Administrative access to Dynamics 365
- Copilot Service Admin Center access
- Required MiraBridge deployment parameters (
deploymentId,region,clientId)
Step 1: Configure the Channel Provider
Access the Channel Provider Configuration
- Navigate to your Dynamics 365 apps overview:
https://YOUR_DYNAMICS_ORG_URL/main.aspx?forceUCI=1&pagetype=apps -
Locate and open Copilot Service Admin Center
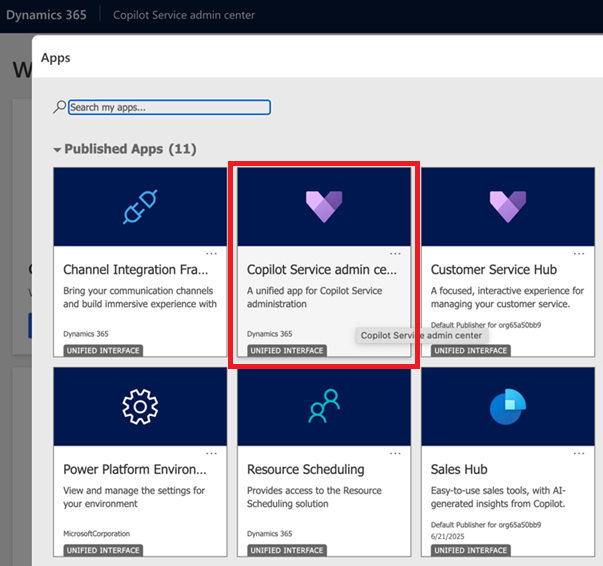
- Navigate to Workspaces [1]
-
Open Third party voice channel provider by clicking Manage [2]

Create the MiraBridge Channel Provider
-
Click + Create to add a new channel provider

-
Configure the provider with these exact values:
Field Value Name MiraBridge Phone Unique Name mb_phone Label MiraBridge Phone Channel URL https://phone.mirabridge.cloud/api/v1/deployment/{deploymentId}/init?region={region}&clientId={clientId}Enable Outbound Communication Yes Channel Order 0 API Version 2 Trusted Domain (leave blank) Custom Parameters (leave blank) Important: Replace
{deploymentId},{region}, and{clientId}with your actual values. -
Ensure the channel provider is Activated [3]
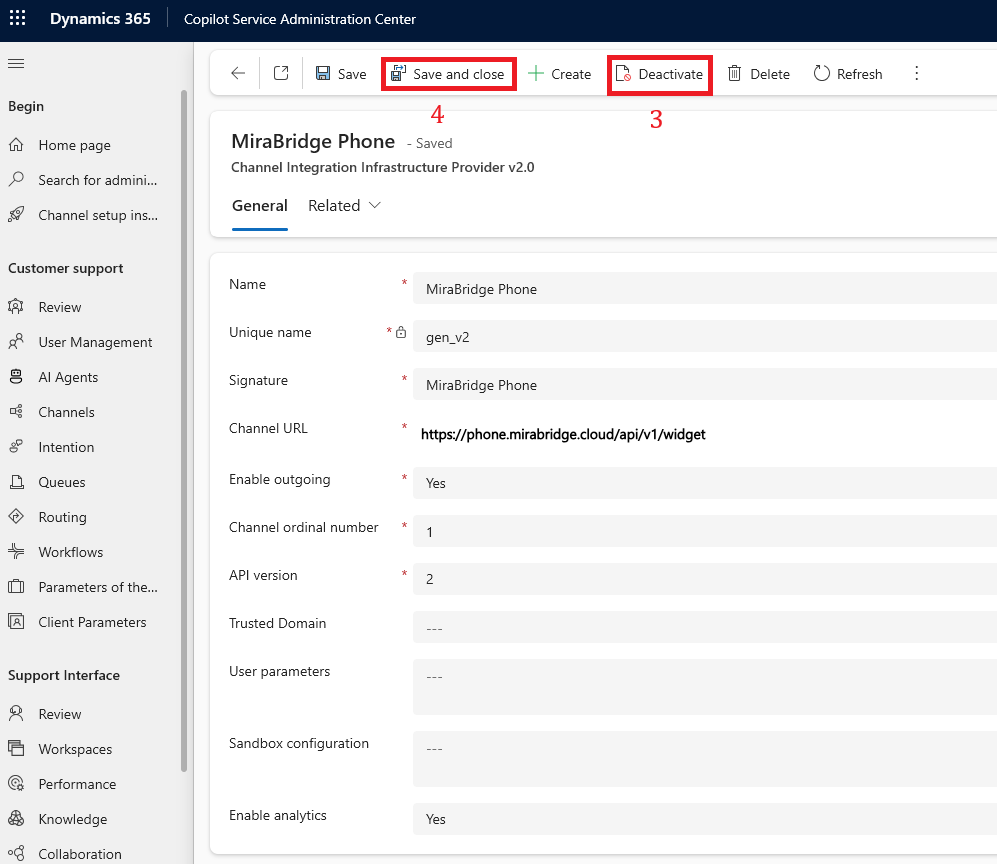
-
Click Save and Close to apply your settings [4]
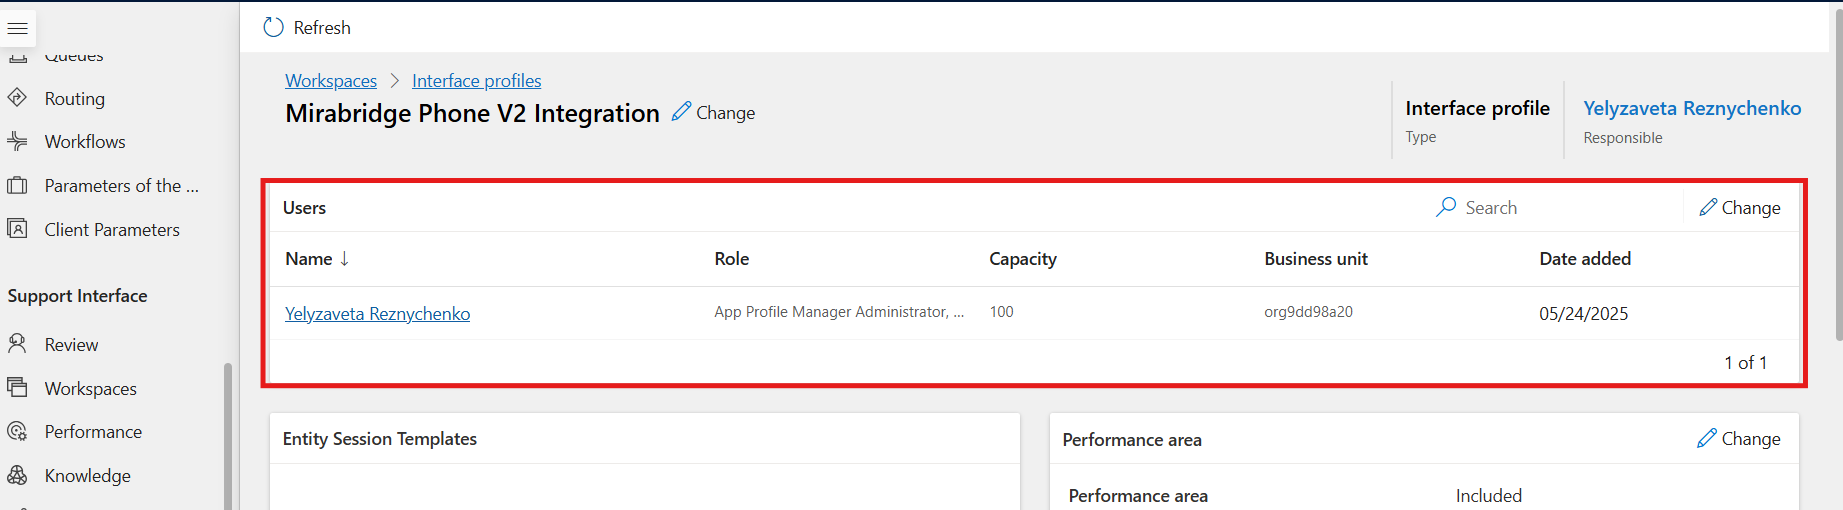
Step 2: Configure Experience Profile
Access Experience Profile Settings
-
Return to Copilot Service Admin Center
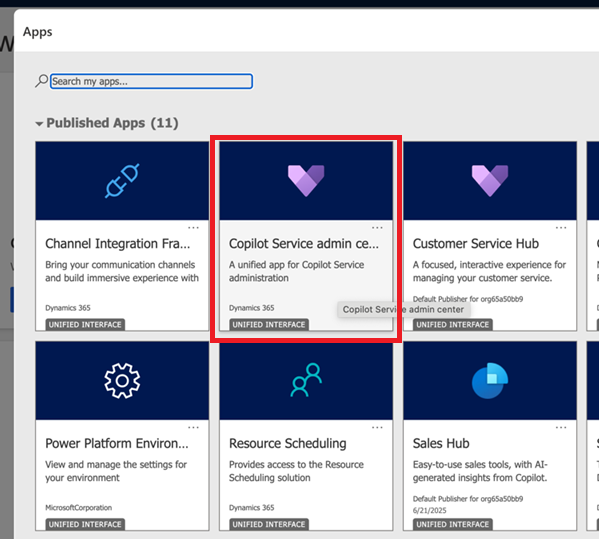
- Navigate to Workspaces [5]
-
Open Experience profile by clicking Manage [6]

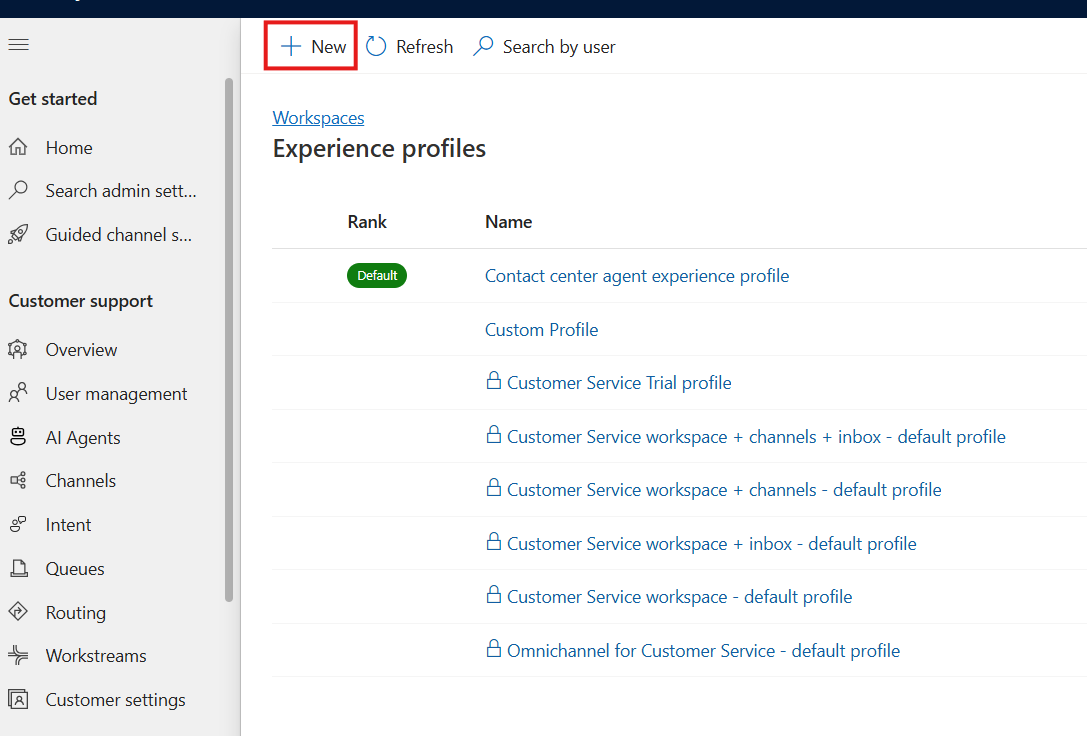
Create or Edit Profile
-
Create a new profile or edit an existing one
Assign Users to Profile
-
Add users to the profile by clicking Change
-
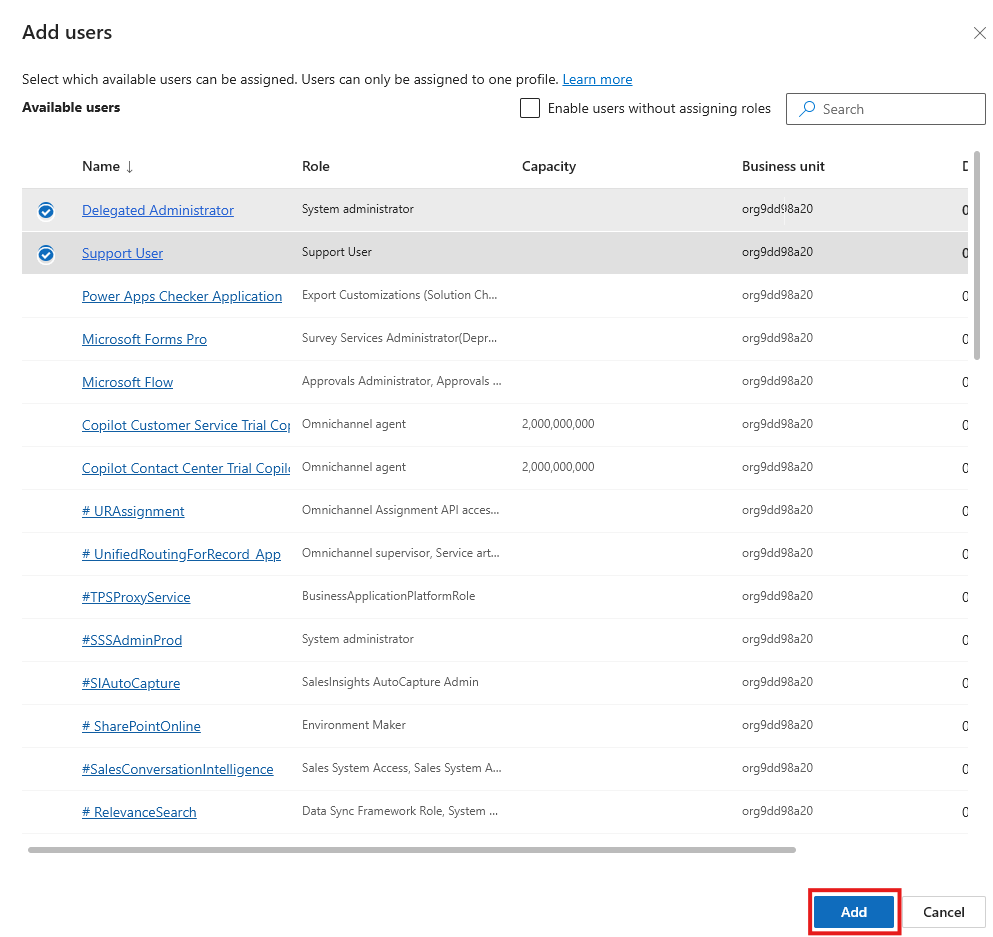
Select users from the available list
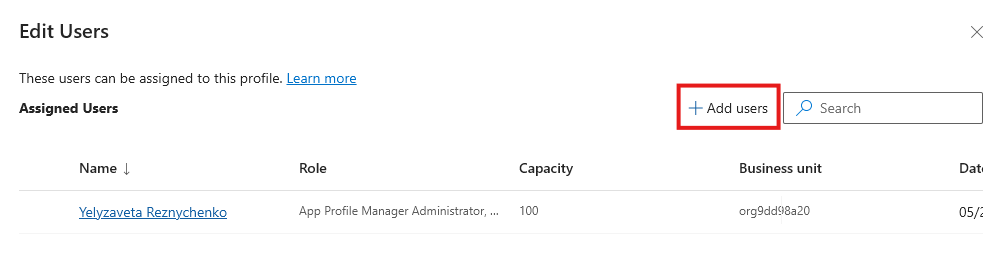
-
Choose all required users and click Add
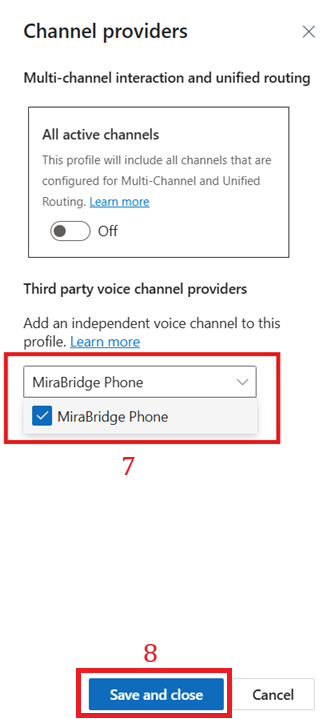
Configure Channel Provider Assignment
- Select MiraBridge Phone as the channel provider [9]
-
Click Save & Close to apply changes [8]
Step 3: Verify Installation
After completing the configuration, MiraBridge Phone will appear on the left side of your Dynamics 365 application:
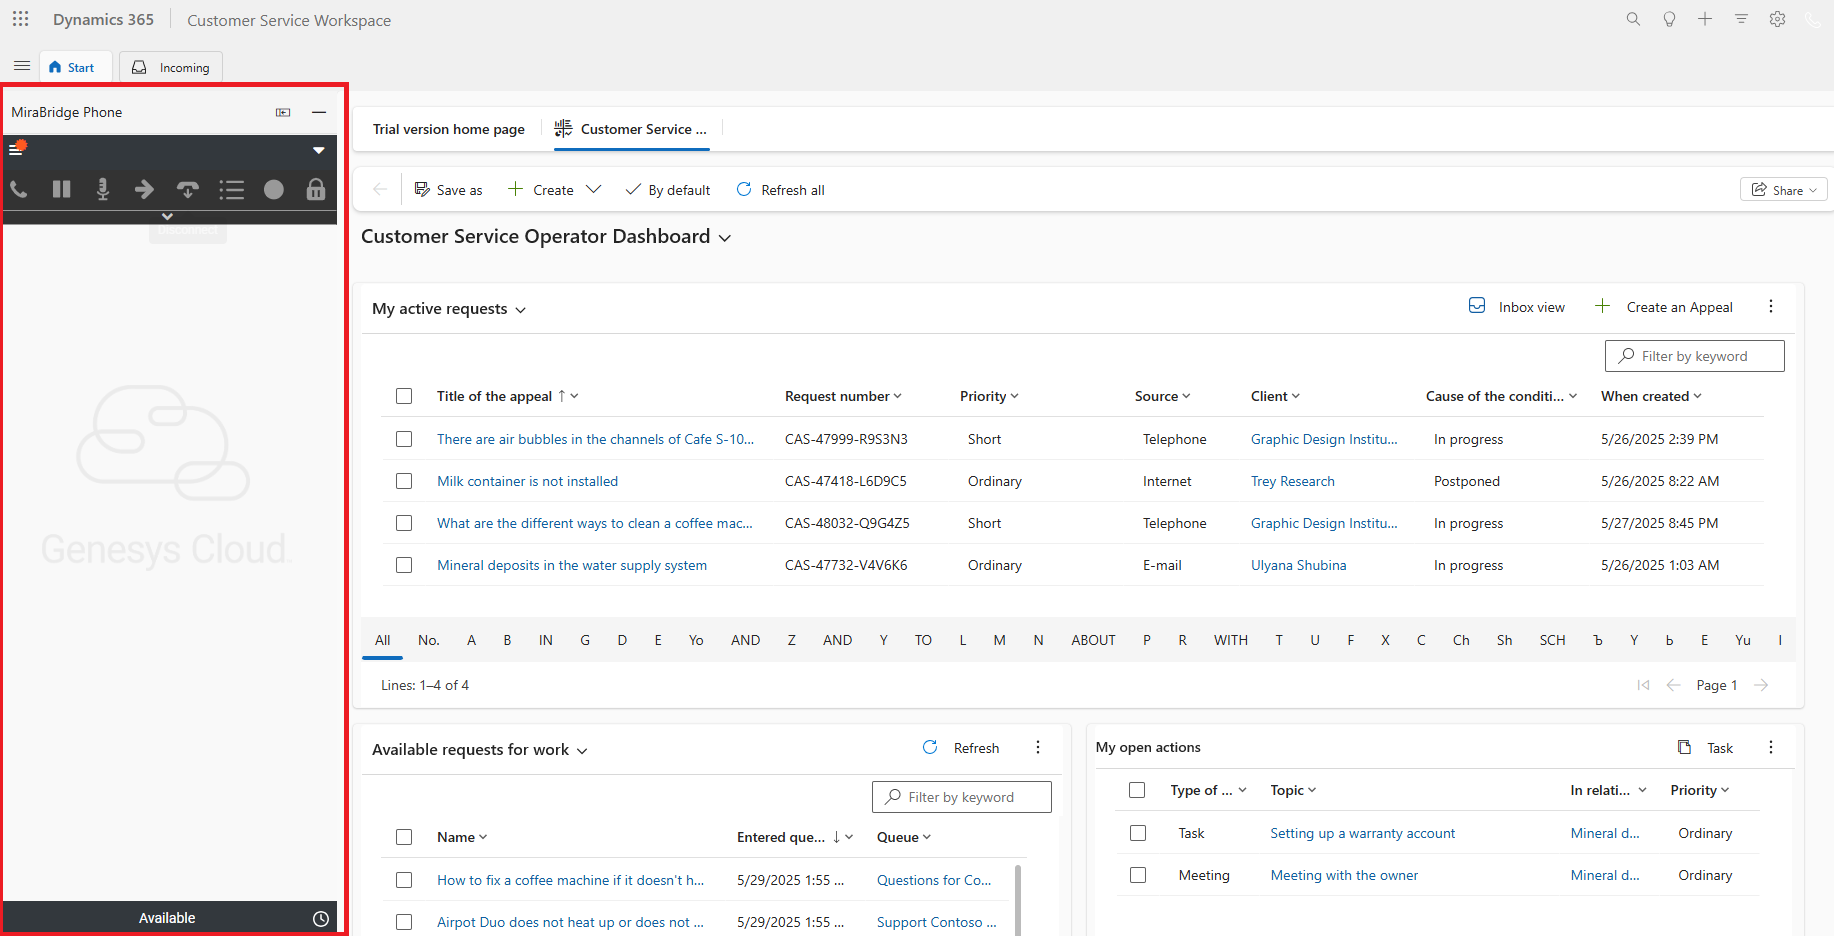
Testing the Integration
- Login Test: Have a test user log into Dynamics 365 and verify the MiraBridge Phone panel appears
- Authentication: Click on the MiraBridge Phone panel and ensure Genesys login works
- Functionality: Test basic telephony features to confirm everything works as expected
Troubleshooting Common Issues
Widget Doesn’t Appear
- Verify the user is assigned to the correct Experience Profile
- Check that the channel provider is activated
- Ensure the Channel URL is correctly formatted
Authentication Issues
- Verify the
clientIdmatches your Genesys OAuth configuration - Check that the
regionparameter matches your Genesys Cloud region - Ensure popup blockers are disabled
Need Help?
If you encounter issues during setup, see our Troubleshooting Guide or contact MiraBridge support.