MiraBridge Phone for Dynamics 365 CIF v1 Setup Guide
This guide provides detailed instructions for deploying MiraBridge Phone within Dynamics 365 environments using single-session mode (CIF 1.0).
Prerequisites
Before starting, ensure you have:
- Administrative access to Dynamics 365
- Channel Integration Framework (CIF) installed
- Required MiraBridge deployment parameters (
deploymentId,region,clientId)
Step 1: Enable Channel Integration Framework
Before configuring MiraBridge Phone, verify that the Channel Integration Framework (CIF) is installed in your Dynamics 365 environment.
Install CIF from Microsoft AppSource
If CIF is not already installed:
- Visit the Microsoft AppSource CIF page
- Click Get it now
- Log in with your Microsoft account (ensure you have administrative rights)
- Select the appropriate Dynamics 365 environment for installation
- Choose from multiple environments if you manage more than one
- Agree to the terms and complete the installation
Access Channel Integration Framework
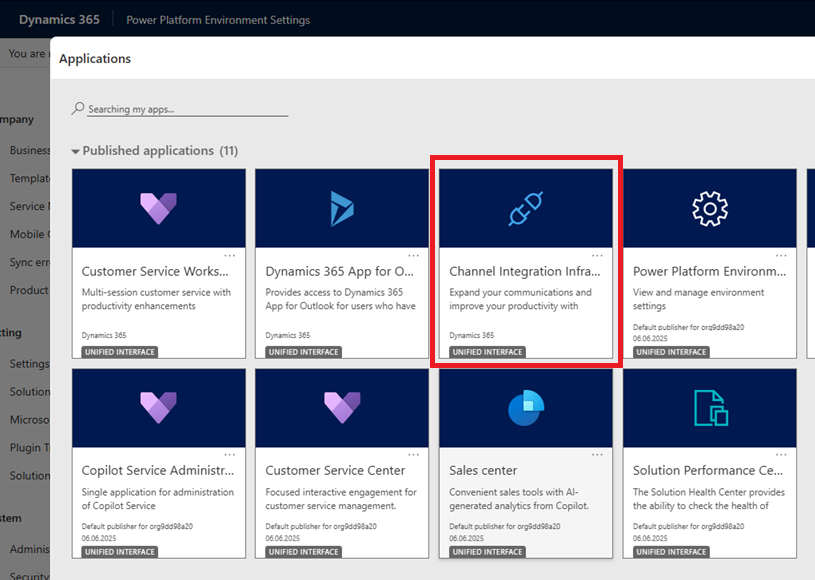
Once installed, launch CIF through the Unified Interface Apps menu:
- Navigate to your Dynamics 365 apps overview:
https://YOUR_DYNAMICS_ORG_URL/main.aspx?forceUCI=1&pagetype=apps - Locate Channel Integration Framework in the applications list
- Open the Channel Integration Framework application
Within CIF, you can set up, update, or remove MiraBridge Phone channel providers.

Step 2: Create MiraBridge Channel Provider
Add New Channel Provider
-
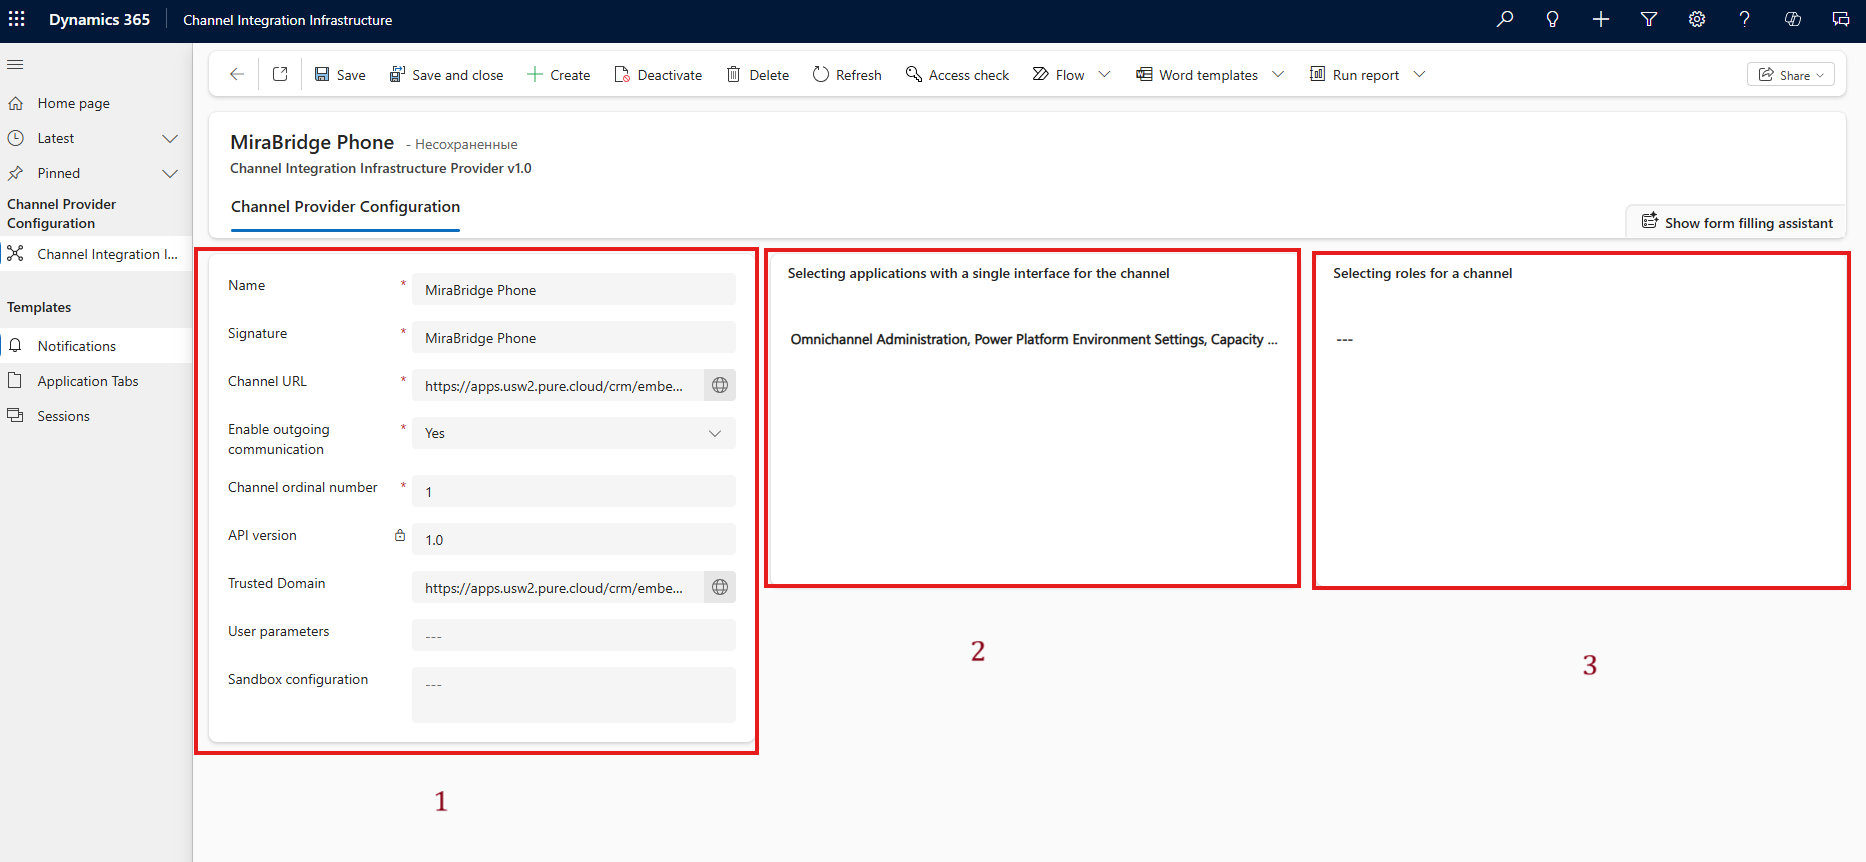
In the Channel Integration Framework app, click + Create to add a new provider

-
Configure the provider with these exact settings:
Field Value Name MiraBridge Phone Label MiraBridge Phone for Dynamics 365 Channel URL https://phone.mirabridge.cloud/api/v1/deployment/{deploymentId}/init?region={region}&clientId={clientId}Enable Outbound Communication Yes Channel Order 1 API Version 1.0 Trusted Domain (leave blank) Custom Parameters (leave blank) Important: Replace
{deploymentId},{region}, and{clientId}with your actual deployment values.
Step 3: Configure Application and Role Assignment
Select Unified Interface Apps
Under Select Unified Interface Apps for the Channel, specify which Dynamics 365 applications should have access to MiraBridge Phone:
- Customer Service Hub
- Sales Hub
- Custom model-driven apps
- Other supported platforms (see Overview)
Assign User Roles
In the Select the Roles for the Channel section, assign user roles that can access the integration:
Common role assignments:
- Basic User
- Customer Service Representative
- Sales Manager
- Custom roles as needed
Activate the Channel
- Ensure the channel integration framework is Activated
-
Verify all settings are correct
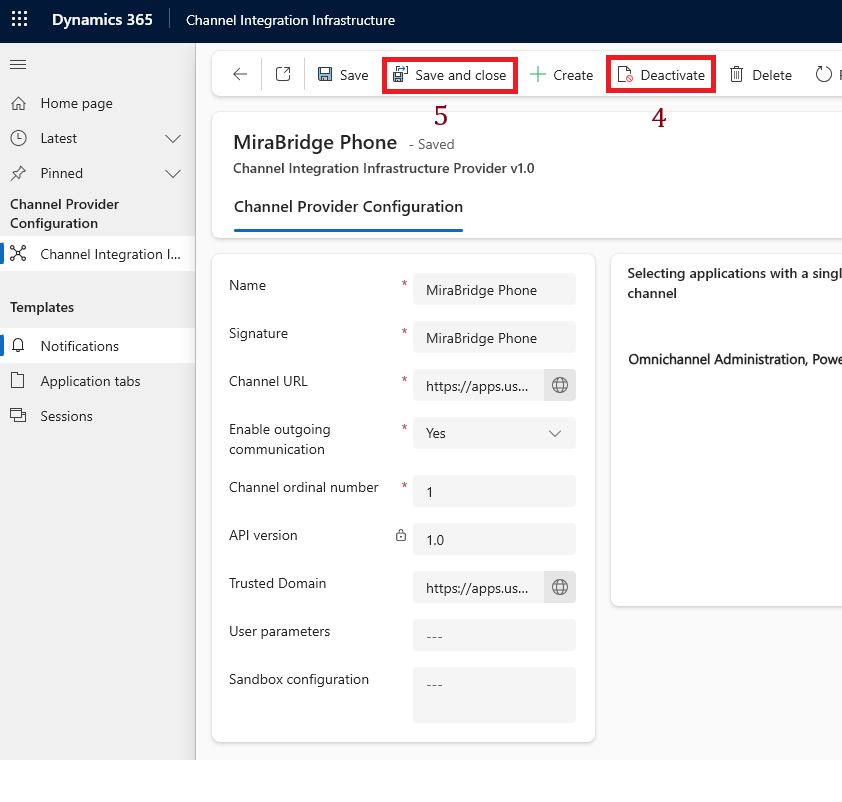
- Click Save and Close to apply your configuration
Step 4: Verify Installation
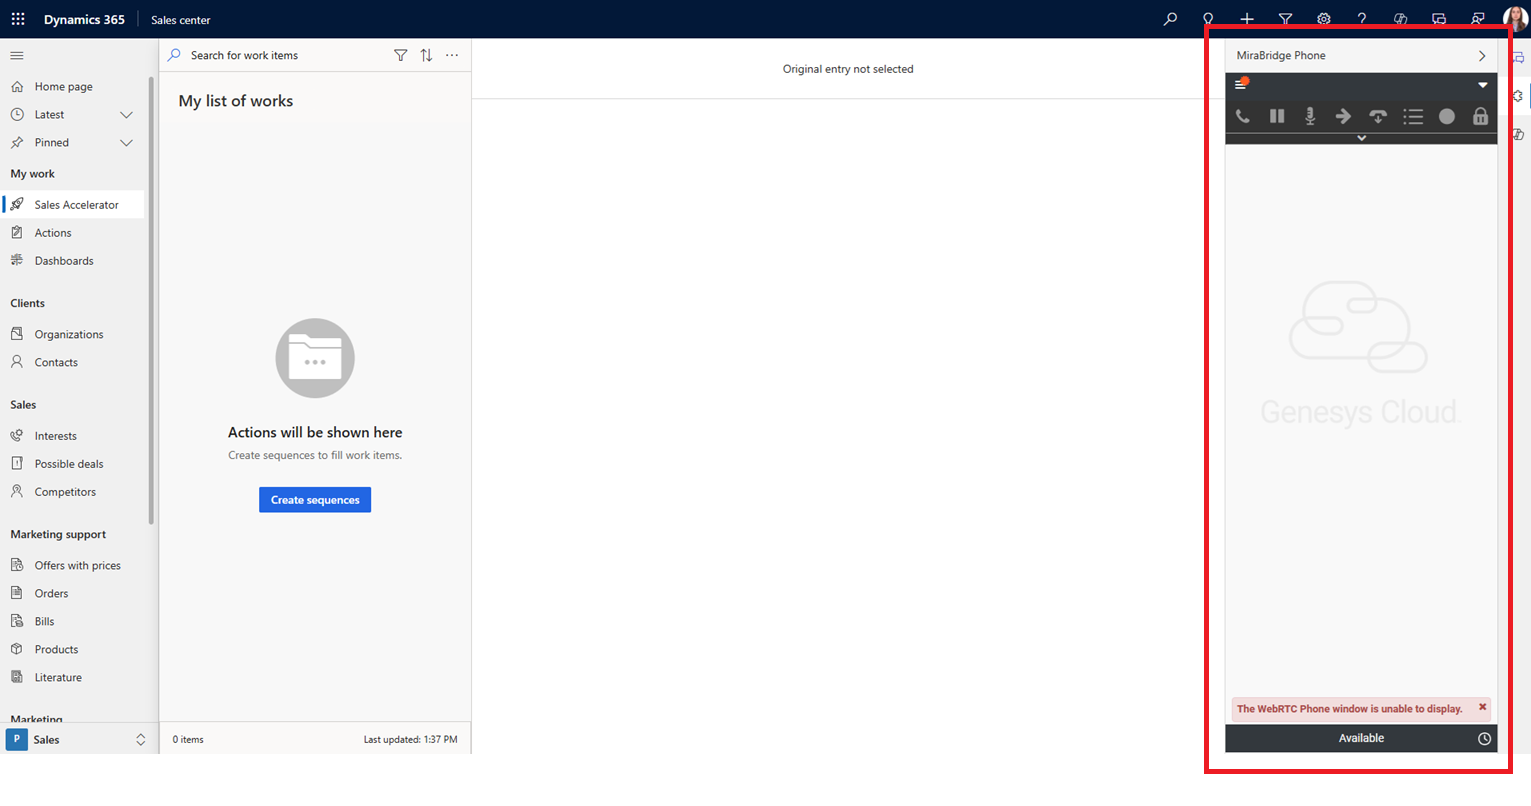
After completing the setup, MiraBridge Phone will appear on the right side of your selected Dynamics 365 applications:
Testing Your Setup
- Access Test: Log into one of the configured Dynamics 365 apps
- Widget Visibility: Verify the MiraBridge Phone panel appears
- Authentication: Test logging into Genesys Cloud through the widget
- Basic Functionality: Make a test call to ensure everything works
Troubleshooting Common Issues
Widget Not Visible
- Check that the user’s role is assigned to the channel
- Verify the application is selected in the channel configuration
- Ensure the channel is activated
Authentication Problems
- Confirm the
clientIdmatches your Genesys OAuth client - Verify the
regionparameter is correct for your Genesys Cloud organization - Check that popup blockers are disabled
URL Configuration Issues
- Ensure all placeholders (
{deploymentId},{region},{clientId}) are replaced with actual values - Verify the URL is accessible from your network
- Test the URL directly in a browser
Next Steps
After successful installation:
- Train your agents on the integrated workflow
- Configure CRM automation rules as needed
- Monitor license usage and performance
- Review our Best Practices Guide for optimization tips
Need additional support? See our Troubleshooting Guide or contact MiraBridge support.